How To Create a New Note
Marking Up your Bible
Notes can be added and displayed before or after a specific verse. Before you can do this, you need to tell the app which folder on your device you want to save your notes in.
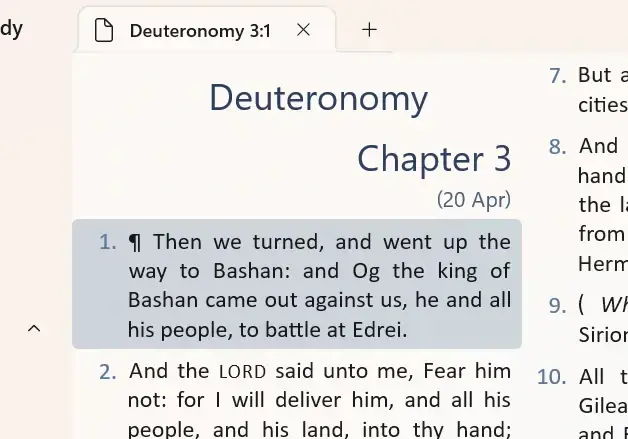
1. Select the verse that you want to associate a note with. The background of the verse will change colour when it is selected. To associate a note with the whole chapter, select the first verse.

2. Click the "New note" command that appears at the bottom of the window. If you have a keyboard attached you can also press Ctrl+N if this is faster for you.
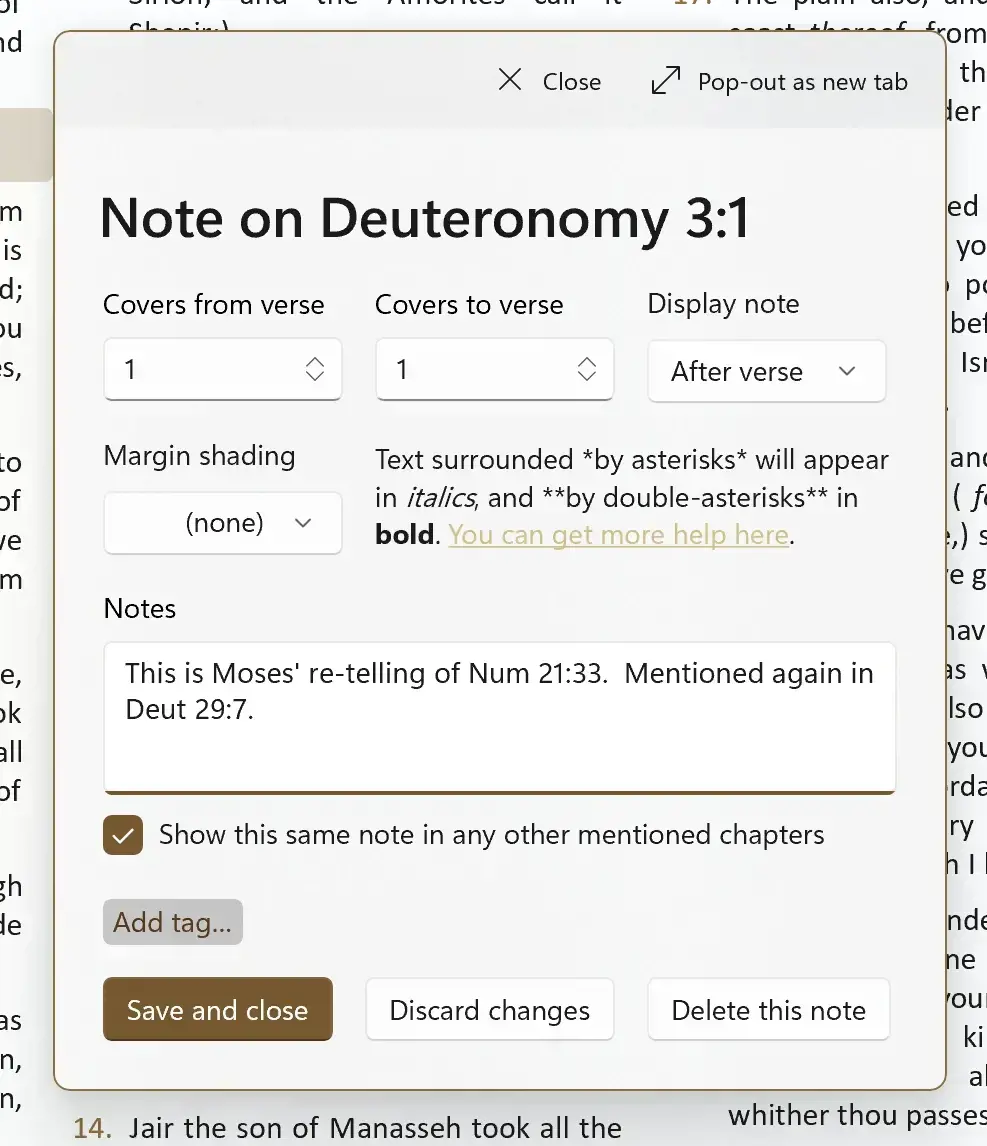
3. Enter the contents of your note. If your device has a small display, the editor may open in a separate tab.
Any references that you type will be shown as clickable or tappable links when the note is displayed in the Bible reading view. Examples of supported references:-
1 Kings 6:20or1 Kings 6v20(a single verse)1 Kings 6:20,22(two verses in the same chapter)1 Kings 6:20-22(a range of verses)1 Kings 6;7(whole chapters 6 and 7 of 1 Kings)Heb 2:3; 12:25(Hebrews chapter 2 verse 3 and Hebrews chapter 12 verse 25)
Note! When typing references, it's really important to separate multiple chapter numbers with a semi-colon (;) and verse numbers with a comma (,). Don't use a comma to separate chapter numbers or the reference won't be understood correctly by the app. You can see this correctly in the examples above.
4. Change whether the note is displayed before or after the selected verse using the "Display note" drop-down. A note that is relevant to the whole chapter might be best displayed "before" the first verse.
It's also useful to set margin-shading notes to appear "before" a verse as they then show as a coloured title for the whole range of verses that are highlighted. You can skip this for now if you're creating your first note, or read more about margin shading here.
5. The "Add..." button allows you to tag a note with one or more tags to help you find related notes quickly in the Notes Library. You can read more about tagging notes here. You can skip this for now if you're creating your first note.
6. The "Show this same note in any other mentioned chapters" tickbox can normally be left ticked. When ticked, if you mention any Bible references in your note text, such as 1 Kings 6:20 or other formats mentioned above, then your note will appear when you read those verses too. To edit your note, you'll have to come back to the current chapter.
This saves you from having to create a dedicated note against every verse in a related set, for example when noting the different uses of a specific word across several verses. Instead, you can create one note but mention the other verses as references by typing them into the note.
When unticked, your note will only appear here in the current chapter next to the verse you chose in the "Covers from verse" box.

7. Click "Save and close" to save the new note, or press Ctrl+S if you have a keyboard attached. Your new note will appear next to the verse.
Opening the Note Editor in a Separate Tab
Normally the Note Editor opens in a pop-up window. You can click or tap the “Pop-out as new tab” command at the top of the editor to open it in a new tab. Your note content will be kept.
If your device has a small screen, the Editor may always open in a separate full-page tab automatically.